

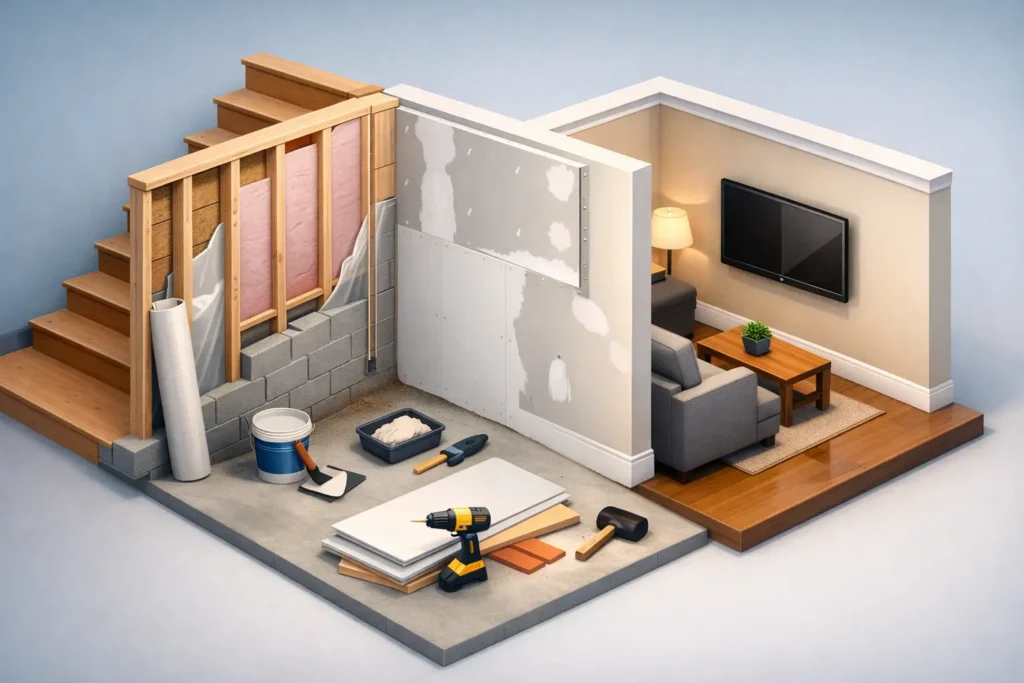
A finished basement can add comfortable living space, better storage, and meaningful property value. But learning how to finish basement walls starts with a reality check: below-grade walls are not built like the walls upstairs. Concrete can hold moisture, exterior water pressure can expose weak points, and a beautiful finish can fail quickly if the wall assembly is wrong.
The goal is not simply to cover concrete. It is to build a dry, durable, clean-looking wall system that performs well through Pennsylvania’s changing seasons. The right preparation protects your investment and gives the finished space the polished appearance homeowners expect.
Start With Moisture Control, Not Drywall
Before framing or hanging a single sheet of drywall, inspect the basement for water intrusion. Look for white mineral deposits on masonry, peeling paint, damp spots, mold growth, cracks, musty odors, or rusted metal components. These are not cosmetic concerns. They are warnings that moisture is moving through or around the foundation.
Address active leaks first. That may involve repairing foundation cracks, improving exterior grading, extending downspouts away from the home, correcting gutter issues, or installing drainage and sump pump improvements where needed. If the basement has had recurring water problems, a wall finish should wait until the source is corrected.
Humidity matters even when there is no visible leak. A basement dehumidifier, properly maintained HVAC system, and adequate ventilation help keep the finished space comfortable and reduce the risk of mold behind the walls. For many homes, maintaining relative humidity around 30% to 50% is a practical target.
A dry foundation creates the right starting point. Finishing over a damp wall only hides the problem until repairs become more expensive.
Choose the Right Wall Assembly
There is no single best way to finish every basement wall. The proper system depends on the condition of the foundation, local code requirements, ceiling height, insulation needs, and how the room will be used. A home theater, guest suite, office, and utility area may each call for different choices.
Insulate Concrete Before Building Inward
Concrete foundation walls are cold and can create condensation when warm interior air reaches them. For that reason, a moisture-resistant insulation layer against the masonry is often the foundation of a dependable basement wall system.
Rigid foam insulation is a common option because it resists moisture better than standard fiberglass batts placed directly against concrete. Closed-cell spray foam can also provide insulation and air sealing in one application, though it is typically more expensive. The best material and thickness depend on the wall condition, local energy requirements, and available space.
Seams, edges, and penetrations should be properly sealed. Small gaps can allow humid air to contact cold concrete, creating hidden condensation where it is hardest to detect. This detail work is one reason professional installation delivers better long-term results than a rushed finish.
Frame With Space and Straight Lines in Mind
Once the foundation wall is insulated and protected, framing creates the cavity for wiring, additional insulation when appropriate, and drywall. A conventional stud wall can produce a clean, familiar finished-wall appearance, but lumber should not sit directly on a potentially damp concrete slab without protection.
Use a pressure-treated bottom plate and an approved sill gasket or separation method where needed. Keep the framing straight, plumb, and consistently spaced so drywall hangs cleanly and trim lines remain crisp. If foundation walls are uneven, the framing should be adjusted rather than forced to follow every wave in the concrete.
Metal studs can be a practical alternative in certain basement projects, particularly where straightness, moisture resistance, or commercial-style construction is a priority. They still need thoughtful installation around openings, blocking, and areas that will support cabinets, televisions, shelving, or heavy wall décor.
Plan Electrical, Plumbing, and Blocking Before Closing Walls
This is the stage to make the basement function well. Map out outlets, switches, recessed lighting, internet connections, plumbing lines, and HVAC modifications before insulation and drywall conceal the framing. Modern finished spaces need enough outlets for entertainment equipment, charging, workstations, and seasonal use.
Install solid blocking anywhere heavy items will be mounted later. This includes television walls, floating shelves, handrails, cabinets, bathroom accessories, and closet systems. Adding blocking during framing is simple. Opening a finished wall later is not.
Electrical work, plumbing changes, egress requirements, and fire safety details may require permits and inspections. Requirements vary by municipality, so it is wise to confirm the scope before construction begins. Bedrooms, for example, generally need code-compliant emergency escape and rescue openings, not just a finished room and a closet.
How to Finish Basement Walls With Drywall
Drywall is usually the final wall surface because it creates a clean, paint-ready finish that fits nearly any design style. In a basement, material selection and installation details matter as much as the appearance.
Use moisture-resistant drywall in areas that may experience higher humidity, such as laundry rooms, utility rooms, and many below-grade living spaces. Cement board or another approved tile backer should be used in shower surrounds and wet bathroom locations. Standard drywall is not a substitute for a waterproof shower system.
Hang drywall with proper fastener spacing and leave small, controlled gaps at floors or other locations where movement and moisture exposure may occur. Corners should be straight, joints should land over framing, and screws should sit slightly below the paper surface without tearing it. Poor fastening and uneven framing can lead to visible waviness, cracked joints, and fastener pops after painting.
Taping and finishing separate an average basement from a premium one. Paper or mesh tape, joint compound, corner bead, and multiple coats are used to create smooth transitions between panels. Each coat needs time to dry before sanding. Rushing this stage creates shadows, ridges, and imperfect seams that become obvious under recessed lights or sunlight from basement windows.
For a refined final appearance, use a high-quality primer followed by durable interior paint. Satin or eggshell finishes are often a practical choice for finished basement living areas because they offer a clean appearance with more washability than flat paint. In utility rooms, storage zones, or high-traffic areas, a more durable finish may make sense.
Details That Make the Space Feel Finished
Wall finishes work best when they are coordinated with the rest of the basement. Baseboards, door casing, window trim, lighting, flooring transitions, and ceiling details should all follow a consistent plan. A well-finished wall can still look incomplete next to uneven trim, exposed gaps, or mismatched materials.
Choose flooring that fits the basement environment. Waterproof or water-resistant options such as luxury vinyl plank, tile, and properly selected epoxy systems can be strong choices depending on the room’s purpose. If carpet is preferred for comfort, make sure the basement has reliable moisture control first.
Do not cover mechanical equipment, shutoff valves, cleanouts, junction boxes, or access points without a plan for service. Access panels can be integrated neatly into drywall or millwork when they are planned early. A finished basement should be attractive, but it must remain practical to maintain.
Sound control may also be worth considering. Mineral wool insulation in interior partitions can reduce noise between a media room, bedroom, office, and utility area. This added step is especially valuable when the basement will become a family gathering space or rental-ready living area.
When Professional Finishing Is the Better Investment
A simple, dry basement storage room may be a manageable project for an experienced homeowner. A full basement renovation with framing, insulation, drywall, lighting, flooring, bathroom work, and code considerations is different. The wall system connects to every other part of the project, and shortcuts behind the drywall can affect comfort, safety, and resale value.
Master Builder Home Improvement LLC approaches basement finishing with attention to the details that last: moisture-aware preparation, solid framing, clean drywall work, durable materials, and premium finishes that suit the home. Clear planning also helps avoid common surprises, such as insufficient outlet placement, lost ceiling height, inaccessible mechanical systems, or a wall design that does not support the intended furniture layout.
The best finished basement walls should disappear into the room. They should feel straight, warm, clean, and ready for everyday life, while quietly protecting the space behind them. Start with a dry foundation, make each layer purposeful, and the finished room will add value you can see and comfort you can feel for years.