

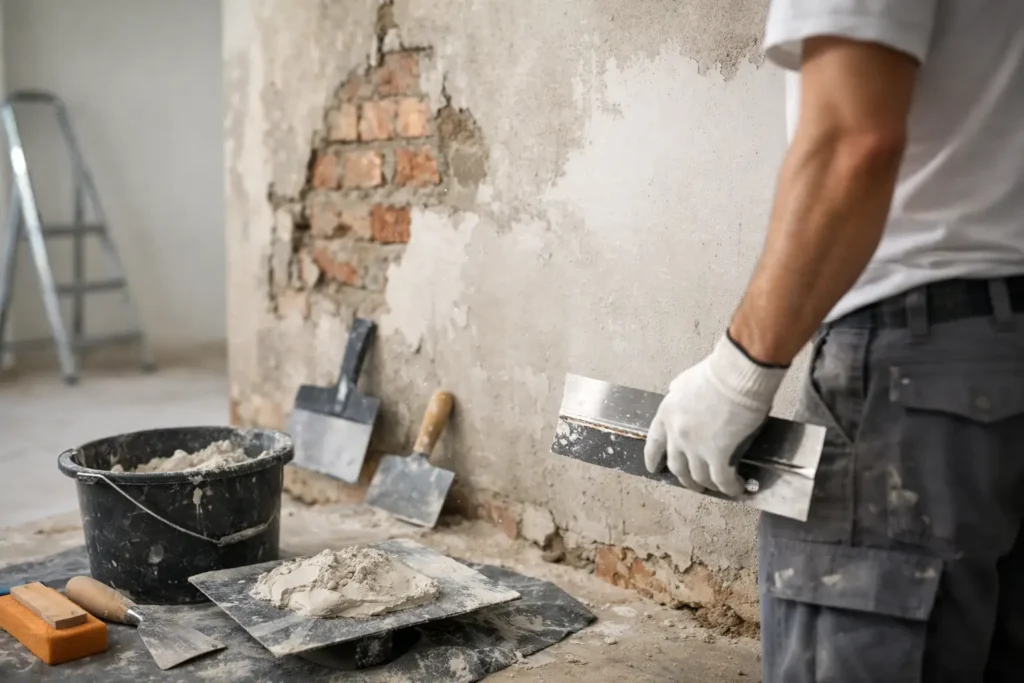
A plaster finish only looks as good as the surface underneath it. If you want to know how to prepare walls for plaster, the real job starts before the first trowel of material ever touches the wall. Good prep is what separates a clean, durable finish from blistering, cracking, uneven texture, or plaster that simply does not bond the way it should.
For homeowners and property owners investing in a premium finish, this step matters. Whether you are applying traditional plaster, a veneer system, or a decorative finish like Venetian plaster, the wall has to be stable, clean, and properly conditioned. Skipping prep may save an hour today and cost a full repair later.
Why wall preparation matters so much
Plaster is not forgiving when the substrate is weak or contaminated. Dust, glossy paint, loose drywall paper, moisture damage, and movement in the wall assembly can all create failure points. Sometimes the problem shows up right away as poor adhesion. Other times it appears months later as hairline cracking, hollow spots, or surface discoloration.
Preparation is also where finish quality is won or lost. If the wall is bowed, patched poorly, or left with high spots and depressions, plaster will highlight those defects rather than hide them. A premium finish depends on a flat, sound base.
How to prepare walls for plaster on different surfaces
Not every wall should be treated the same way. The correct prep depends on what is already there.
Drywall is one of the most common surfaces for plaster work, but new drywall and previously painted drywall need different handling. Fresh drywall may need joints taped and treated correctly, while painted drywall often needs cleaning, dulling, or a bonding primer so the plaster can grip.
Old plaster walls can be more complicated. If the existing plaster is solid and only has minor cosmetic damage, it may be repairable and ready for a skim coat after cleaning and patching. If it is loose, cracked deeply, or pulling away from the lath, surface prep alone will not solve the problem.
Masonry surfaces like block, brick, or concrete are generally strong but can vary in porosity. Some pull moisture too quickly from the plaster, while others need special bonding treatment because they are too smooth or sealed. In these cases, material compatibility matters as much as basic cleanliness.
Start with a full wall inspection
Before prep begins, inspect the wall from top to bottom in good lighting. Look for cracks, staining, peeling paint, softness, movement, mold, water damage, and previous patchwork. Press on suspicious areas. Tap sections that sound hollow. Check corners, window lines, and spots near plumbing fixtures where hidden moisture problems are more likely.
This is where many projects go off track. People assume plaster will cover defects, when in reality it often makes them more visible. If the wall has structural movement, active leaks, or failing substrate, those issues need to be corrected first.
Clean the surface thoroughly
Plaster needs a clean bonding surface. That means removing dust, grease, soap residue, smoke film, and anything else that can interfere with adhesion. In kitchens, bathrooms, and commercial settings, this step is especially important because invisible residue is common.
Start by dry dusting or vacuuming the wall. If needed, wash the surface with an appropriate cleaner and allow it to dry fully. The goal is a wall that feels solid and clean, not chalky, oily, or slick.
A wall can look clean and still fail a bond test. That is why experienced finish crews treat cleaning as a performance step, not just a cosmetic one.
Remove loose material and unstable layers
Any loose paint, peeling compound, flaking plaster, torn drywall paper, or soft patching material has to go. Plaster should be applied over a stable surface, not over layers that are already separating.
Scrape failing areas back to a sound edge. Sand rough transitions where needed. If drywall paper has torn, seal it properly before moving forward. If old paint is glossy but still well bonded, it may need to be dulled or primed rather than removed entirely.
This is also the stage to address nails or screws that have backed out, damaged corner beads, and weak repairs from previous work. Small defects are easier to fix now than after finish plaster is applied.
Repair cracks, holes, and uneven areas
A quality plaster finish starts with a wall that is reasonably flat and solid. Small holes, surface cracks, and shallow low spots should be filled with compatible repair materials. Larger damage may require patching with drywall, basecoat plaster, or other substrate-specific methods.
Cracks deserve special attention. A simple surface fill is not always enough. If a crack is caused by movement, poor fastening, or structural settling, the repair should address the cause, not just the visible line. Reinforcement may be needed in some areas to reduce the chance of the crack telegraphing back through the finish.
The flatter the wall at this stage, the cleaner the final result. That is especially true with polished or decorative plaster systems, where light reflects across the surface and exposes imperfections.
Control moisture before plastering
Moisture is one of the biggest reasons plaster work fails. If the wall has active water intrusion, high humidity, or damp masonry, no amount of finish skill will make the system last. The wall has to be dry and stable before plaster goes on.
This can be a major issue in basements, exterior-facing masonry, bathrooms, and older properties. Water stains, efflorescence, soft drywall, and musty odor are all warning signs. In those cases, the smart move is to pause and solve the moisture source first.
Even when there is no damage, absorption rate matters. Very dry, porous surfaces can pull water out of plaster too quickly, weakening workability and cure. Some substrates need dampening or priming to create the right balance.
Prime or bond the wall when needed
One of the most important parts of how to prepare walls for plaster is knowing when the surface needs a bonding agent or primer. Not every wall requires the same product, and the wrong one can create its own problems.
Painted surfaces often need a bonding primer so plaster can adhere properly. Very porous walls may need a sealer or conditioner to control suction. Smooth concrete or dense surfaces may require a specialty bonding product. Decorative plaster systems may also call for manufacturer-specific primers to ensure the texture and finish develop correctly.
This is where shortcuts create expensive callbacks. Premium finishes perform best when the prep products match the substrate and the finish system being used.
Tape, reinforce, and protect transition areas
Joints, inside corners, outside corners, and transitions between different materials need extra care. These areas are common stress points, and if they are not reinforced correctly, cracks often show up there first.
On drywall-based systems, joints should be taped and treated properly before skim or finish plaster is applied. On repair work, transitions between patch areas and existing wall surfaces should be feathered cleanly. Corners should be straight, secure, and free from impact damage.
Protection matters too. Floors, trim, windows, and adjacent finished surfaces should be masked before plastering starts. A clean jobsite supports a cleaner result.
Understand when the wall is ready
A wall is ready for plaster when it is sound, dry, clean, repaired, and properly primed for the finish being installed. It should not have active movement, loose layers, contaminants, or untreated damage. The surface should also be consistent enough that the plaster can cure evenly and be finished without fighting the substrate.
That does not always mean the wall has to be perfect before plaster begins. Some plaster systems are designed to correct minor irregularities. But there is a difference between normal surface variation and underlying failure. Good preparation respects that difference.
Common mistakes that ruin plaster finishes
The most common prep mistakes are easy to recognize after the fact. Applying plaster over glossy paint without bonding treatment often leads to adhesion problems. Skimming over damp walls traps moisture and causes staining or failure. Ignoring cracks, weak substrate, or hollow sections usually means the same defects return through the new finish.
Another mistake is assuming all surfaces can be handled with the same process. They cannot. A bathroom wall with old semi-gloss paint, a repaired drywall ceiling, and an old masonry wall each require different prep decisions.
That is why professional execution matters. Prep is not just labor. It is judgment.
When professional wall prep makes sense
For standard utility spaces, simple wall prep may be manageable for an experienced DIYer. But if the finish is high-visibility, decorative, or part of a larger remodel, professional prep often protects the investment. The more premium the final result, the less room there is for surface inconsistency.
At Master Builder Home Improvement LLC, proper preparation is treated as part of the finish itself, not an optional extra. That approach matters whether the goal is a smooth plaster wall, a luxury Venetian plaster feature, or a full interior update built to add lasting value.
If you want plaster to look clean on day one and stay that way, start by respecting the wall underneath. A durable finish is rarely about applying more material. It is about preparing the surface well enough that the craftsmanship can show.